ARTICLE HELPFUL?

YES NO

ARTICLE HELPFUL?

PLEASE SELECT A REASON WHY

255 character limit  / 255

THANKS FOR YOUR FEEDBACK

11/12/20

Call of Duty: Black Ops Cold War Storage Management

Steps to manage your Call of Duty: Black Ops Cold War content files

Call of Duty: Black Ops Cold War launches with the option to manage the content you have stored on your console or PC hard drive. Follow the steps below to manage your content and free up hard drive space via in-game menus.

Please note: If you choose to revisit content you uninstalled, you can redownload it through your platform's Store.

PlayStation and Xbox consoles

On consoles, you’ll first need to install the entire base game—Campaign, Multiplayer, Zombies, and Dead Ops Arcade. Once your installation is complete, you can then optionally delete content to manage your hard drive storage.

  1. Select Options from the main menu.
  2. Navigate to the General tab.
  3. Scroll to the bottom and select Game Installs.
  4. Highlight any content you wish to uninstall and press Select.
    • Campaign
    • Multiplayer
    • Zombies
    • Dead Ops Arcade
  5. Select Uninstall, then select Confirm.

If you uninstall Call of Duty: Black Ops Cold War but still have Call of Duty: Modern Warfare installed, Call of Duty: Black Ops Cold War DLC will remain on your console. To remove Call of Duty: Black Ops Cold War DLC, launch Call of Duty: Modern Warfare, then follow the steps above.

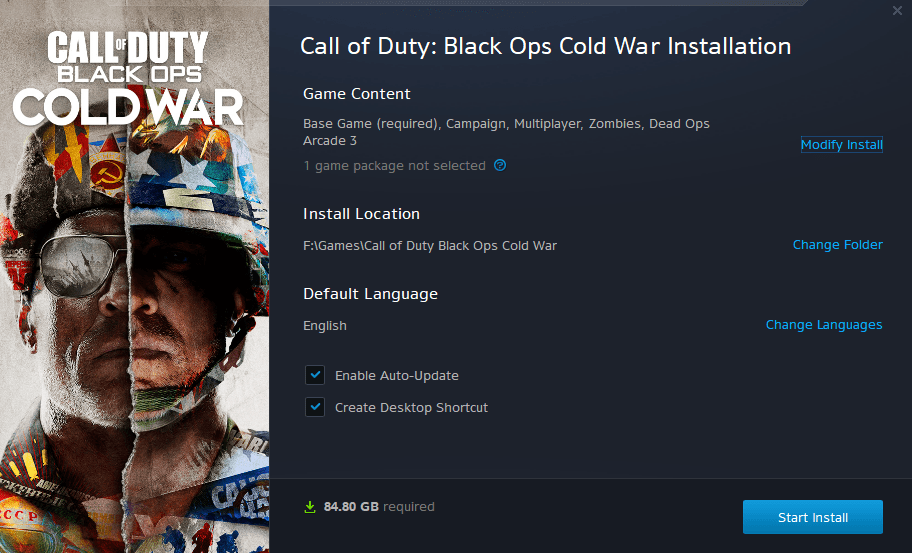
PC/Battle.net

When you first install Call of Duty: Black Ops Cold War on PC, you can choose to install portions of the base game. Follow these steps to selectively install game content.

1. Open the Battle.net Launcher and start the game installation.

2. Under Game Content, select Modify Install.

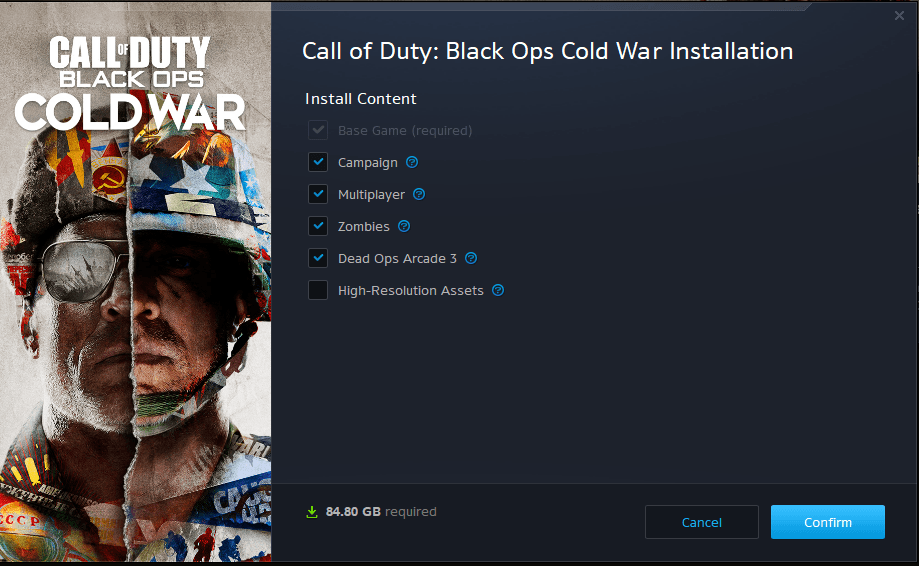
3. On the Installation screen, check the content you wish to install.

  • Campaign
  • Multiplayer
  • Zombies
  • Dead Ops Arcade
  • High-Resolution Assets – This pack is not installed by default and is intended to benefit players running high visual settings with at least 8GB VRAM on 4K monitors.

4. Select Confirm.

5. Select Start Install.


You can also manage your installed content after your first installation.


1. Open the Battle.net Launcher.

2. Select Call of Duty: Black Ops Cold War from the panel on the left.

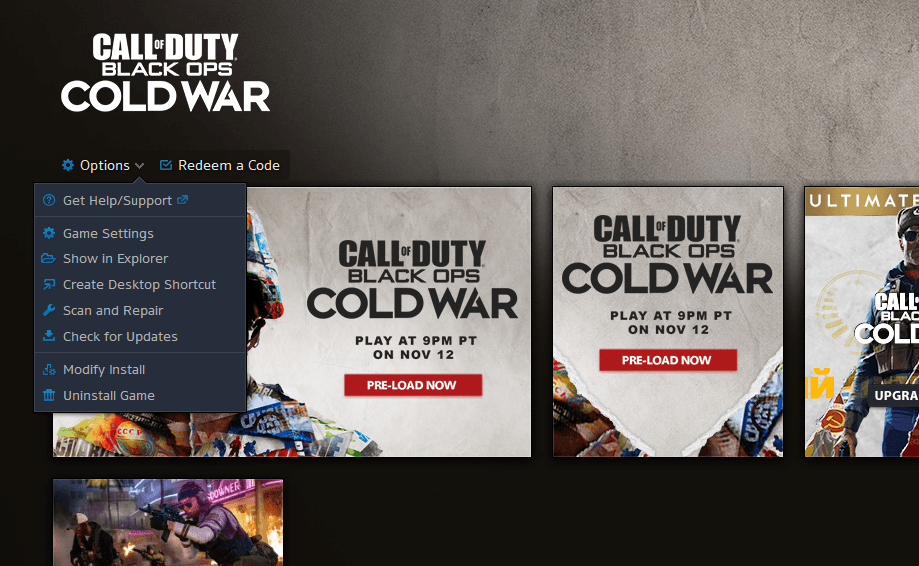
3. Select the Options menu on the left-hand portion of the Battle.net Launcher.

4. Select Modify Install to open the installation pop-up.

5. Under Game Content, select Modify Install.

6. Check or uncheck the content you wish to manage.

  • Campaign
  • Multiplayer
  • Zombies
  • Dead Ops Arcade
  • High-Resolution Assets

7. Select Confirm.

8. Select Start Install.

Looking For More Help?

CONTACT SUPPORT

BROWSE SUPPORT PAGE: CALL OF DUTY: BLACK OPS COLD WAR

The Software License and Service Agreement will be updated. Please follow this link [https://www.activision.com/legal/ap-eula] in order to see these changes.